Roof valleys carry more water than any other part of a sloped roof. Two planes funnel rain, snowmelt, and debris into a narrow channel, and if anything is slightly off, water finds a way inside. I’ve repaired hundreds of valleys on homes with architectural, three-tab, and even designer asphalt shingles. The pattern is familiar: a small stain on a ceiling, then a drip during wind-driven rain, then rot if it’s ignored. The good news is that a methodical fix lasts for decades. The bad news is that shortcuts tend to fail right when you need the roof most.
This guide covers how to diagnose a valley leak on a shingle roof, which repairs make sense for different conditions, and a step-by-step process that balances durability and cost. I’ll also call out common mistakes I’ve seen from well-meaning DIYers and even a few shingle roofing contractors who should have known better.
Why valleys leak, even on good roofs
A valley leak rarely comes from a single cause. It’s usually two or three small issues lining up. Water follows physics, not your intentions, and valleys amplify small flaws because of the concentrated flow.
The most frequent culprits are poor shingle lapping along the valley line, missing or corroded valley metal, improperly installed ice and water shield, nail placement too close to the centerline, and debris dams that back water under the shingles. In cold climates, ice dams at the eave push meltwater up the valley and under laps. In hot climates, UV breaks down sealant and dries out organic dust that otherwise helps the shingles lock in place. If the roof pitch is below 4:12, the valley design and underlayment matter even more because water drains slower and runs wider.
Manufacturers allow two common valley styles on shingle roofing: open metal valleys and closed-cut shingle valleys. There is also the woven valley, where shingles interlace from both sides. Each can perform well if installed correctly. Most valley leaks I see trace back to skipped steps, not the design. A closed-cut valley looks cleaner but has less tolerance for errors in nail placement and cut lines. Open metal valleys handle heavy flow and snow better, but only if the metal is properly sized, lapped, and hemmed.
Find the true source before you start ripping shingles
Valley leaks can mimic other issues. Water can enter at the ridge, run down the underlayment, and appear in the valley two bays away. I start with a dry-day inspection from the attic if accessible. With a flashlight, look for dark tracks on the underside of the roof deck, especially along seams. If the insulation is damp, gently pull it back to see the wood. Follow gravity marks until you lose the trail. On the roof, check the valley centerline for blisters in the shingles, exposed nails, shingle tips cut too close to the center, or sealant band-aids. Look up-slope for protrusions that share the drainage path, like vents or satellite mounts. On homes with multiple converging valleys, the upstream valley may be the villain.
A garden hose test helps isolate the problem. Start low, wetting only the bottom three feet of the valley for several minutes, and work your way up in stages. If a leak appears inside, note the stage and area. This avoids chasing the wrong spot, which is how roofs end up needlessly torn apart.
Tools and materials that actually help
Over the years I’ve refined what goes on the roof with me for a valley repair. Extras that people haul up and never use slow you down and tempt improvisation. The essentials for a clean valley repair include flat bars, a roofing hammer or coil nailer with 1.25 to 1.5 inch galvanized roofing nails, hook blade and straight blade utility knives, a chalk line, snips for metal trimming, and a caulk gun with high-quality polymer-based roofing sealant used sparingly. I bring self-adhered ice and water shield, 24-inch or 36-inch wide valley metal if the design is open, replacement shingles that match type and exposure, and a handful of 1-inch pan-head screws for temporary staging or safety tying metal. In cold weather or over existing ice shield, I carry primer for the membrane manufacturer I’m using.
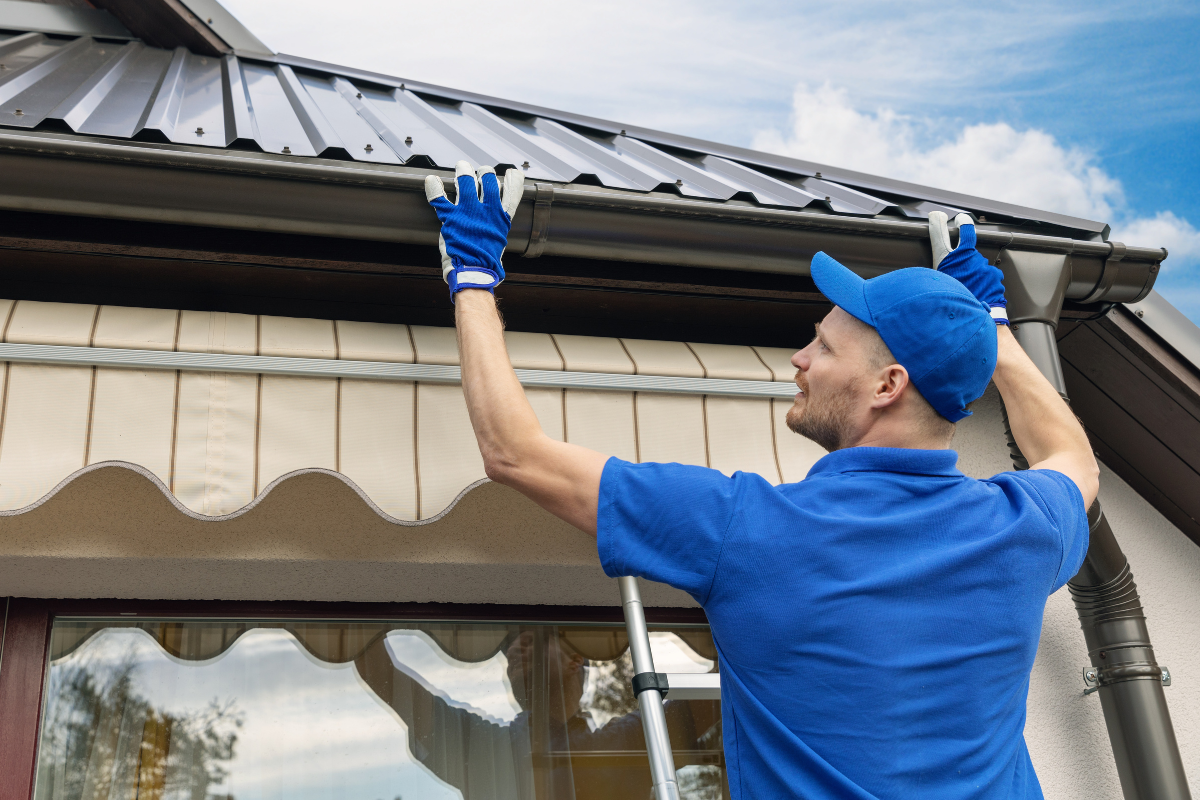
Safety can’t be an afterthought. A roof with a valley pitches you toward the edge. I use a harness, rope, and a roof anchor. Staging a roof jack below the work zone with a plank saves knees and reduces shingle damage. If you are not comfortable with heights or you are working on a steep slope, hire a shingle roofing contractor who does valley work regularly. Valley repairs on a 6:12 may be manageable for a careful homeowner. At 9:12, hand the job off.
When to repair versus replace
A valley fix can be isolated if the rest of the roof still has life. I check three things. First, shingle condition: if granules are mostly intact, shingles are flexible, and tabs don’t snap when lifted, repair makes sense. If shingles are brittle or the roof is near the end of its rated life, a localized repair may fail to bond well. Second, deck integrity: soft, punky wood in the valley indicates long-term leakage and suggests a targeted section of roof shingle replacement or more extensive work. Third, prior workmanship: if the valley was badly designed across its length, spot repairs may treat symptoms rather than the root cause.
As a rule of thumb, if I find multiple leaks within 6 to 8 feet of the valley center and shingles are 18 to 22 years old on a 25-year product, I recommend replacing the valley from eave to ridge and, if budget allows, reworking adjacent courses. If you are already planning a roof shingle replacement in the next two to three years, you might still do a modest repair to stop interior damage, but do not overspend on a cosmetic fix.
Understanding valley styles and their trade-offs
Open valleys use exposed metal in the flow channel. They move water efficiently and shed debris well. The metal should be formed with a center rib or W-bar for extra protection against cross-wash in heavy storms, and edges should be hemmed to keep water centered. I prefer 24-inch wide minimum, 26 gauge galvanized or painted steel, or aluminum where salt air is a factor. Copper is excellent but pricey. Keep nails at least 6 inches away from the centerline in an open valley.
Closed-cut valleys are popular because the shingles cover the valley metal and produce a neat diagonal cut. They rely heavily on precise nailing and underlayment. The valley is typically lined with ice and water shield first, then regular felt or synthetic underlayment overlaps it, and shingles from the “under” slope extend across the valley into the far slope before being over-cut. The final shingle strip on the cut side is trimmed to a clean 2 inch to 3 inch reveal from the valley centerline. Manufacturer details vary, but the no-nails zone near the valley is non-negotiable.
Woven valleys interlace shingles across the center. They can work on steeper roofs with three-tab shingles and in areas without snow load. With thicker laminated shingles, woven valleys tend to lump up, trap debris, and encourage capillary action in slow drains. I install woven valleys only when a homeowner specifically wants that look and the roof pitch and climate fit.
Step-by-step: repairing a leaking shingle valley
Every roof is different, but a disciplined sequence keeps you out of trouble. This process assumes an asphalt shingle roof with a closed-cut valley originally, which is the most common residential scenario, though I’ll note the variations for open valleys as we go.
Prepare the work zone
Lay out your staging below the valley. Snap a chalk line along the ground or driveway to keep debris contained and away from plantings. Pick a dry, mild day. Adhesives and self-adhered membranes bond best between roughly 45 and 90 degrees Fahrenheit, depending on brand. Too cold, and the membrane won’t stick without primer and heat. Too hot, and shingles tear under foot traffic.
Remove shingles around the suspect area
Start at the top of the wet zone you identified, usually a few feet above the interior stain. Slide a flat bar under the shingle tabs, gently breaking the seal. Work upslope, lifting nails only as needed to release the shingles. Avoid prying through the shingle face. For a thorough valley repair, strip shingles back at least 18 inches from the centerline on both sides, and often more, until you hit good bond and undamaged underlayment. Label or stack salvageable shingles by course if you plan to reuse them, though new shingles generally give a cleaner, longer-lasting result.
Inspect the underlayment and deck
With shingles removed, you should see the ice and water shield running up the valley. If it is torn, wrinkled, or short of the eave by more than a few inches, that alone can explain the leak. Probe the roof deck with an awl. Sound wood resists; compromised OSB can flake or feel spongy. If the deck is soft or blackened, cut out the damaged section to the nearest rafter and sister in solid framing, then patch with matching thickness plywood or OSB. Fasten properly so you have a flat plane for the new valley.
Decide on open or closed valley going back
If debris build-up or cross-wash caused the leak, consider switching to an open metal valley if the aesthetic suits the home. On older roofs with a closed-cut style, you can still install an open valley in the repair area as long as you integrate the metal correctly beneath the surrounding shingles. If the homeowner prefers the original look and the flow volume is moderate, a closed-cut valley can be restored with improved membranes and correct cut lines.
Install new ice and water shield
Vacuum or brush off dust and granules so the membrane bonds. Prime if temperatures or substrate conditions warrant. For a closed-cut valley, run at least a 36-inch wide strip centered in the valley, lapping over the underlayment below by the manufacturer’s minimums. If you need two lengths, lap them 6 inches, always shingling in the direction of water flow so the higher piece overlaps the lower. Extend the membrane past the eave into the gutter line, and up the valley at least 3 to 4 feet above the previously wet area, often to the ridge for peace of mind. Roll it tight to avoid fish mouths.
For an open valley, I still use a full-width ice shield under the metal. It is cheap insurance in wind-driven rain and during ice events.
Place the valley metal if using an open style
Cut the valley metal to length and dry-fit. If you use a W-valley, center it and check that the rib sits straight. I prefer a 1 inch hem on both edges to stiffen the piece and guide water, which a sheet-metal shop can form or you can buy pre-hemmed. Secure the metal with roofing nails outside the future shingle edges, usually 6 to 8 inches from the centerline, spaced 12 to 18 inches apart. Never nail through the middle. Where two pieces meet, overlap at least 8 to 12 inches with a bead of butyl or compatible sealant between them, then clamp or hand-roll to set. Do not smear sealant along the exposed center. That catches dirt and slows flow.
Reinstall underlayment transitions
On a closed-cut valley, the field underlayment from both slopes should overlap onto the ice shield without bridging. Trim wrinkles. Seal small cuts with membrane patches. The goal is a smooth, continuous slope that does not steer water sideways.
Shingle sequencing matters
Work from the lower eave upward. On a closed-cut valley, shingle the “under” plane first. Extend each course at least 12 inches across the valley centerline onto the opposite slope. Nail them a safe distance from the center, typically 6 inches or more, following your shingle manufacturer’s valley nailing diagram. Then shingle the “cut” side, stopping your courses short of the center. Snap a clean chalk line parallel to and 2 inches from the valley centerline on the cut side. Using a hook blade, cut the overlying shingles along this line, and trim the top corners of the cut shingles back 1 inch to create a small dog-ear. This prevents capillary action from carrying water across the cut and under the shingle.
For an open valley, terminate shingles from both sides so they leave an open channel. I aim for 3 to 4 inches of exposed metal on each side of the centerline, more on low slopes or heavy snow regions. Again, no nails closer than 6 inches to the center. If the local code or manufacturer allows, a narrow bead of compatible sealant can be dabbed under the shingle edge to reduce flutter, but do not rely on surface sealant as the primary defense.
Keep nails out of the danger zone
This point deserves its own step because it causes so many leaks. Do not nail within 6 inches of the valley centerline, and on low pitches or closed-cut valleys, give yourself even more margin. Every time I open up a leaking valley and see shiny nail heads close to the center, I know why the leak happened. If you must secure a stubborn shingle, move the nail upslope and outboard. The shingle’s self-seal strip will do the rest once it warms.
Blend and seal where appropriate
Replace any removed hip or ridge caps near the valley intersection. At the eave, ensure shingles lap properly into the gutter apron or drip edge. Where you must tie into older shingles, lift the existing tabs, clean out granules, and use a few dabs of roofing cement or polymer sealant to encourage a bond. Use sealant like a gasket, not like frosting. Thick smears trap debris and bake into brittle ridges that divert water.
Water test and tidy up
Once the new valley is in place, repeat a controlled hose test. Start low, give it time, and work up. If it stays dry inside after a good 10 to 15 minutes at the suspect spots, clean the site. Collect stray nails with a magnet. Sweep loose granules off the valley so they don’t form a dam at the eave after the first storm.
Small details that separate a lasting repair from a temporary patch
Details make or break a valley repair. A 2 inch cut line, not 1 inch. Dog-ear corners on the cut side. A membrane that actually extends into the gutter trough rather than stopping shy and creating a hidden joint. If you are working on laminated shingles with pronounced profiles, take the time to feather any high spots so water does not stall behind a thick butt right at the cut.
If snow load is common, consider a metal W-valley even beneath a closed-cut appearance. Manufacturers allow a concealed W under a closed cut in some assemblies, which gives you the look of shingles while the water https://louisstwc703.lowescouponn.com/how-to-compare-quotes-from-shingle-roofing-contractors rides a dedicated channel underneath. Make sure your shingle brand and model permit this hybrid, then follow their minimum widths and laps.
On low slopes, 3:12 to 4:12, widen the open valley exposure to 4 to 5 inches per side, and run the ice and water shield farther upslope. Many leaks on low slope shingle roofs begin where water meanders beyond the expected width and finds an errant nail.
Common mistakes and how to avoid them
I see five recurring errors in valley repairs that come back to haunt owners.
- Nailing too close to the centerline. Water finds nail holes. Keep fasteners back and rely on proper overlaps and self-seal. Cutting shingles too tight to the center. Maintain that 2 inch to 3 inch reveal on closed cuts so water stays in the channel. Skipping continuous ice and water shield. Patches over felt are not a substitute in a valley where water volume is high. Relying on surface goop. Sealant has its place, but if your repair depends on beads of black cement, it will fail under heat and UV. Undersized or flat valley metal. Thin, unhemmed metal can oil-can, trap water, and corrode. Use the right gauge and a hemmed edge.
What to expect from a professional shingle roofing contractor
If you bring in a pro, ask how many valley repairs they do in a season and which valley styles they prefer for your pitch and climate. A contractor who offers a single approach for every roof is often selling convenience, not performance. I prefer crews that carry multiple valley metals on the truck and can form hems on site. A detailed estimate should outline whether the repair will be closed-cut or open, how far the tear-off extends, what underlayment will be used, and how deck repairs are handled if discovered.
On price, a straightforward valley repair with no deck replacement on a one-story, walkable roof can run a few hundred to around a thousand dollars in many markets. Add height, steepness, or structural patching and that number easily climbs to two to three thousand. Material choices, especially copper or color-matched steel, also influence cost. Time-wise, most valley repairs are a single day for a two-person crew, though drying interior materials and repainting ceilings is a separate timeline.
Maintenance that keeps valleys dry
Roofs do better with a little attention. Clean valleys twice a year, or more if you have a heavy leaf load. Make sure gutters are free flowing because a plugged gutter backs water into the valley termination. From the ground, scan for shingle tips curling near the valley or a widening cut line. After big wind events, look for displaced ridge caps that could shed water into the valley path. If ice dams are common in your area, improve attic insulation and ventilation so snow melt is even and controlled, and consider heat cable only as a last resort. Good insulation and airflow do more for a shingle roof than any gadget.
Special cases: metal transitions, dormer tie-ins, and multiple converging valleys
Valleys get trickier where different roof planes and materials meet. A common one is where a main roof valley dies into a wall or dormer. Here, your valley should hand off to step flashing along the wall, with ice and water shield tucked behind siding or counterflashing. Leaks often appear where someone ran continuous flashing rather than steps, or where siding is tight to the shingles, pinching the flow. If you are repairing such a spot, remove a course or two of siding or cladding to rework the flashing and membrane properly. It’s not glamorous, but it stops the leak for good.
Another edge case is a triple valley intersection, where two upper valleys dump into a lower one. Water volume spikes there. I enlarge the open valley width, upgrade to heavier metal with a W divider, and extend the ice and water shield farther. Nails get pushed even farther back. If ice forms in your climate, install ice and water shield on the lower roof beyond code minimums at these intersections.
Where a shingle roof meets a standing seam or other metal roof, do not attempt to weave materials. Terminate the metal with proper end dams and receivers, then extend the shingle underlayment and shingles to overlay as the metal manufacturer prescribes. Consult both manufacturers’ details. I’ve seen more than one leak created by creative improvisation at mixed-material valleys.
A quick note on roof shingle installation details that matter near valleys
Even if you’re only repairing, understanding the original roof shingle installation helps you avoid repeating mistakes. The exposure dimension, offset pattern, and starter placement all influence how water moves near a valley. For example, overshooting the exposure on courses adjacent to a valley can thin the material where you need it thickest. Shortcuts on starter shingles at the eave allow wind to lift the first course and push rain up the valley line. If you suspect the original layout was sloppy, take the time to correct the course spacing within a few feet of the valley so the new work ties into a stable field.
For homeowners planning broader work, a full roof shingle replacement is the time to upgrade valley details. Use higher quality ice and water shield, specify open W-valleys in snow country, and set clear no-nail zones in crew training. The slight additional cost pays back in reliability.
Real-world example
A colonial in a windy coastal town called after a nor’easter left a brown stain at the dining room ceiling. The roof was a 12-year-old laminated shingle roof, 6:12 pitch, with a closed-cut valley above the leak. Hose testing showed dripping only when water ran down the center third of the valley. We opened six feet of shingles on either side. The ice and water shield had a vertical slit about 8 inches long, likely from a footstep during the original install, and two nails sat within 3 inches of the centerline. The deck was sound. We installed new ice and water shield from eave to ridge, switched to a concealed W under the closed-cut look to match the neighborhood aesthetic, widened the cut reveal to a consistent 2.5 inches, and kept nails 7 inches back. The repair took one day, plus a return trip to verify drying. Three storms later, the ceiling stayed dry, and the homeowner scheduled a gutter cleaning plan to keep the valley clear. Cost was mid-range for our area, far less than a premature reroof.
When DIY becomes false economy
Plenty of homeowners can manage a small shingle roof repair. Valleys raise the stakes. If you are uncomfortable moving on the roof, if your roof is steep or high, or if you uncover rotten decking wider than a rafter bay, call a professional. A miscut valley or a few nails in the wrong place can lead to hundreds of gallons of water over a season. Spending for a competent shingle roofing contractor is cheaper than repairing ceilings, insulation, and framing later.
If you decide to proceed yourself, be patient, keep your work clean, and resist the urge to smear sealant where proper laps and nails are the answer. The craft is in the layout and the restraint.
The payoff of doing valleys right
A well-executed valley becomes the most robust part of a shingle roof rather than its weakness. Water slides where you intend, wind has little to grab, and snow harmlessly bridges the channel until it melts. Whether you adopt an open metal valley for capacity or a crisp closed-cut for a cleaner line, the underlying principles are the same: continuous membrane, correct laps, no nails in the flow path, and thoughtful shingle geometry. Follow that, and your shingle roof will stand up to the hard days, not just the gentle ones.
Express Roofing Supply
Address: 1790 SW 30th Ave, Hallandale Beach, FL 33009
Phone: (954) 477-7703
Website: https://www.expressroofsupply.com/
FAQ About Roof Repair
How much should it cost to repair a roof? Minor repairs (sealant, a few shingles, small flashing fixes) typically run $150–$600, moderate repairs (leaks, larger flashing/vent issues) are often $400–$1,500, and extensive repairs (structural or widespread damage) can be $1,500–$5,000+; actual pricing varies by material, roof pitch, access, and local labor rates.
How much does it roughly cost to fix a roof? As a rough rule of thumb, plan around $3–$12 per square foot for common repairs, with asphalt generally at the lower end and tile/metal at the higher end; expect trip minimums and emergency fees to increase the total.
What is the most common roof repair? Replacing damaged or missing shingles/tiles and fixing flashing around chimneys, skylights, and vents are the most common repairs, since these areas are frequent sources of leaks.
Can you repair a roof without replacing it? Yes—if the damage is localized and the underlying decking and structure are sound, targeted repairs (patching, flashing replacement, shingle swaps) can restore performance without a full replacement.
Can you repair just a section of a roof? Yes—partial repairs or “sectional” reroofs are common for isolated damage; ensure materials match (age, color, profile) and that transitions are properly flashed to avoid future leaks.
Can a handyman do roof repairs? A handyman can handle small, simple fixes, but for leak diagnosis, flashing work, structural issues, or warranty-covered roofs, it’s safer to hire a licensed roofing contractor for proper materials, safety, and documentation.
Does homeowners insurance cover roof repair? Usually only for sudden, accidental damage (e.g., wind, hail, falling tree limbs) and not for wear-and-tear or neglect; coverage specifics, deductibles, and documentation requirements vary by policy—check your insurer before starting work.
What is the best time of year for roof repair? Dry, mild weather is ideal—often late spring through early fall; in warmer climates, schedule repairs for the dry season and avoid periods with heavy rain, high winds, or freezing temperatures for best adhesion and safety.