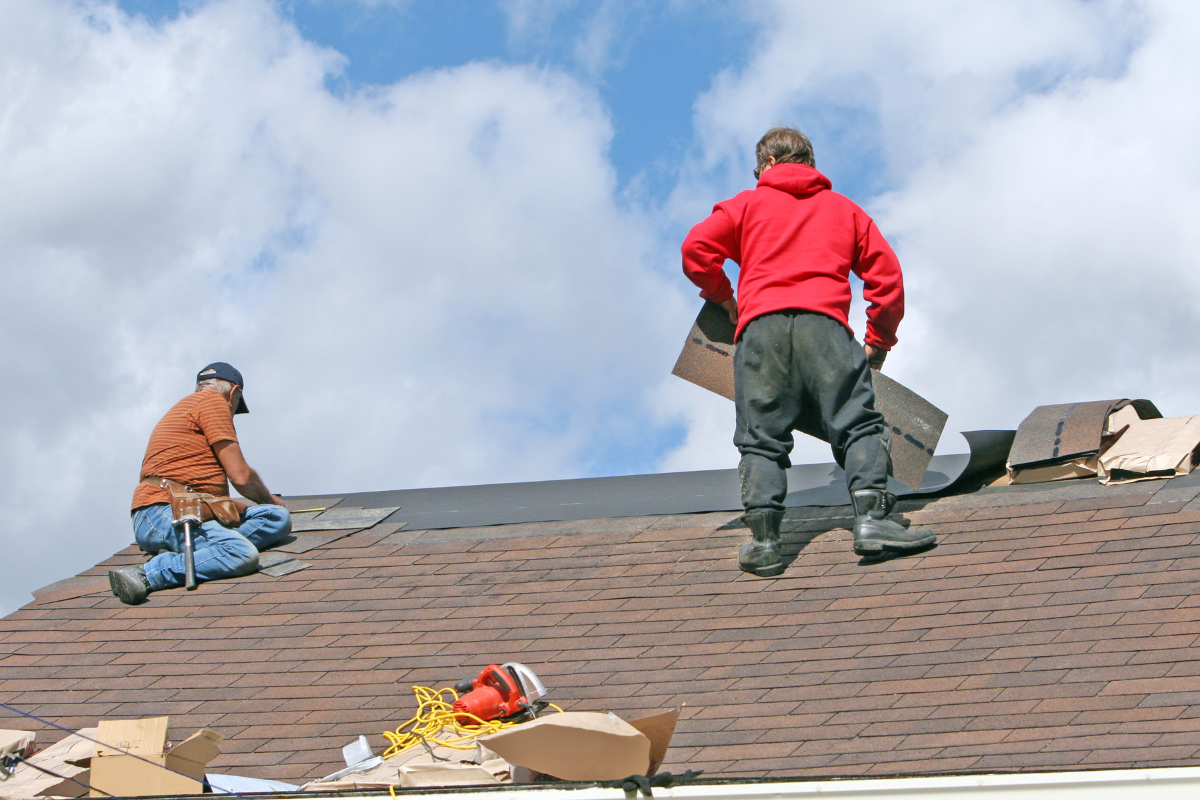
Shingle work looks straightforward from the ground. You see a regular pattern, a nail gun, and a stack of bundles. The reality changes when you climb a ladder, feel the pitch under your boots, and the sun turns the shingles into hot, granular sandpaper. Good technique matters, but nothing matters more than coming down safely at the end of the day. I have walked hundreds of roofs for roof shingle installation, roof shingle repair, and roof shingle replacement. The jobs blur together, yet the near-misses stick in memory: a gust of wind that lifts a sheet of felt like a sail, a foot that skates across a dusty shingle, a nail that finds a palm instead of plywood. The following guidance folds in what the manuals say and what experience teaches the hard way.
Read the roof before it reads you
Start with the roof you actually have, not the one you wish you had. Pitch dictates almost everything. A 4/12 slope lets you walk with care. A 6/12 makes you think about fall protection. An 8/12 or steeper belongs to a harness and rope, even for a small patch. The surface matters as well. Older shingle roofing sheds granules, especially on south and west faces, and that loose grit is as slick as marbles on concrete. Moss, pollen, and morning dew create a film so thin you will not see it until you start to slip. I make a habit of tapping the shingles with a boot at the eave before committing my weight; if they skate, I adjust the plan.
The building’s geometry can trick you. Valleys funnel your feet toward a fall line. Dormers, skylights, and plumbing vents interrupt your stride and your rope path. Satellite dishes and solar mounts hide lag bolts that can slice gloves. Map these obstacles from the ground with binoculars or a phone zoom, then again once you are up there. If you plan a shingle roof repair in a valley or near an edge, assume the work will feel more awkward and build in time to move slower.
Weather is not a backdrop, it is a co-worker
Temperature and wind change how shingles behave. Asphalt gets pliable in summer heat. On a July afternoon, new shingles tear at the nail head if you bump them wrong, and old shingles smear when you pry them apart. In the cold, shingles become brittle and crack instead of bending, which turns a simple roof shingle repair into a patchwork. Plan roof shingle installation and roof shingle replacement between roughly 45 and 85 degrees Fahrenheit when you can. Work the south and west planes early in the day before they cook, then swing to the shade.
Wind deserves more respect than it usually gets. A felt underlayment turns into a kite at 15 to 20 miles per hour. A stack of three bundles on the ridge will walk away from you at half that if the wrap is torn. If gusts are forecast above the low twenties, postpone. You gain nothing roofing in a wind that tugs your hat off and tugs your footing with it. Moisture rounds out the trifecta. Dew, fog, and a sprinkle do not look dramatic, but they put a microscopic lubricant on granules. If you have to pause for an hour to let the roof dry, do it.
Ladder work: the first and last hazard of the day
Most injuries I have witnessed started at the ladder, not the shingles. A safe ladder setup is boring to watch and never makes stories, which is exactly the point. Use an extension ladder that extends three feet past the eave. Set the feet on solid ground at a 4:1 angle, check the rubber pads, and tie the ladder off at the top to something structural, not the gutter. I sometimes screw a temporary 2x4 cleat into the fascia above the ladder to keep it from skittering sideways. It takes five minutes and removes a nagging worry.
Where you step off matters. Pick a landing where you can step onto a flat deck, not a steep pitch, and not into a valley. If you have to transition near an edge, install a roof jack and a plank before you fully leave the ladder. Keep your hands free when climbing. That means hoisting tools and bundles by rope or using a material lift. I have seen people carry nail guns in their off hand while climbing. The first missed rung becomes a controllable slide if both hands are free and a disaster if one hand is hooked around a heavy tool.
Personal protective equipment that actually gets worn
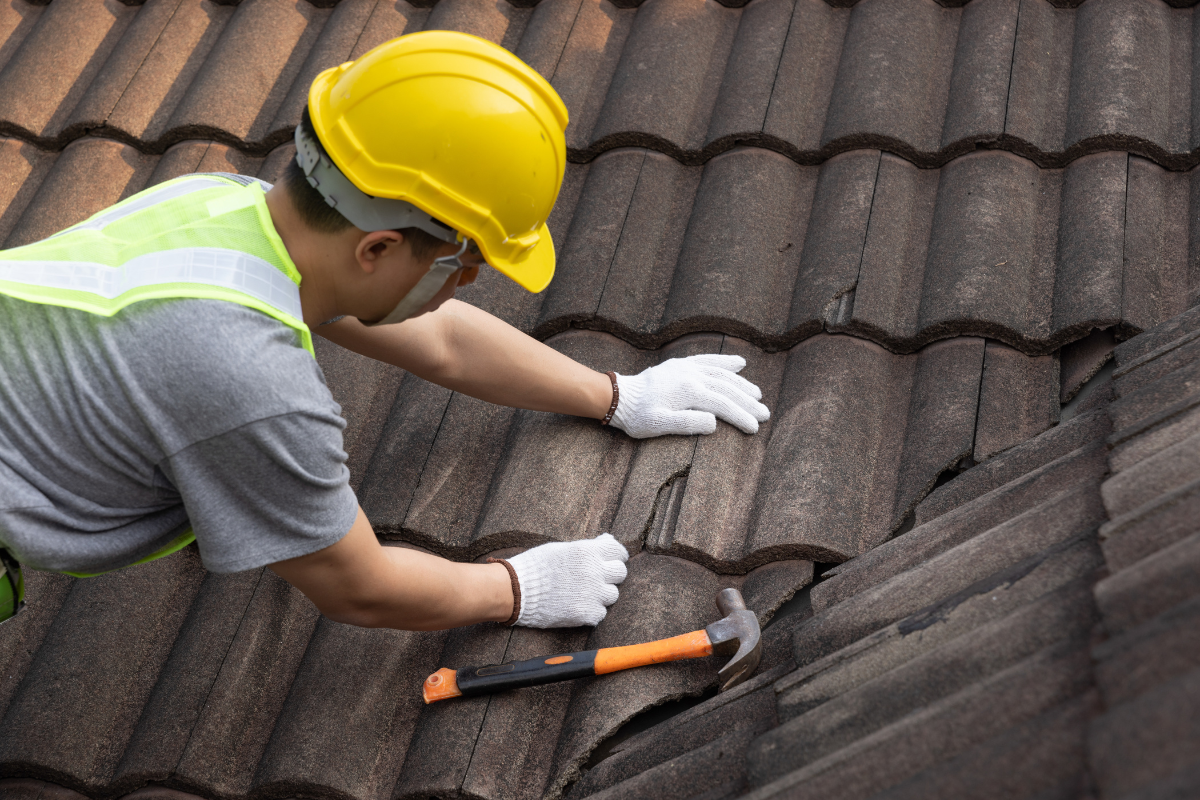
The best safety gear is the gear you keep on all day. I keep the list short and effective. Helmets matter more on tear-offs than on fresh installs because of pry bars and sliding debris, but a low-profile hard hat or bump cap protects your skull on soffit edges and open rafters. Gloves need enough dexterity to pick up cap nails and peel shingle wrappers. Thin, grippy, cut-resistant gloves work on cool days. In heat, fingerless roofers’ gloves balance grip and breathability, though you will trade some knuckle protection.
Footwear decides your confidence. Soft, flat soles with a sticky rubber compound grip shingles better than aggressive lugs. Clean the soles with a brush or by dragging a foot across the ridge every so often. If you step in a pile of granules, you carry them like ball bearings under your boots. Safety glasses prevent the tiny stuff, granules and flashing slivers, that irritate eyes and blow costs. Hearing protection seems optional until you run a compressor and nail gun all day near a wall. Toss in knee pads if you expect to spend hours on a low pitch. Your knees will thank you in ten years.
Fall protection that adapts to shingles
On a true DIY roof shingle installation, fall protection is the line between a scary slip and a life-altering fall. A full-body harness with a vertical lifeline and rope grab is the common, practical setup. Anchor placement is where you make or break the system. Put a rated anchor in the right location and your rope never snags. Put it wrong and you fight the rope all day, then start ignoring it. For most gables, an anchor near the ridge, offset from your working area, gives you a safe swing path without dragging your rope over fresh shingles.
The details matter. Fasten anchors to rafters or trusses, not just decking. Twelve to sixteen structural screws or nails, depending on the anchor, seated flush. On a roof shingle replacement, you can preplan anchors during tear-off and reinstall shingles over them at the end. On a small shingle roof repair, add a temporary anchor and plan to replace a few shingles when you patch the holes. Keep the lifeline taut but not tight enough to trip you. If you have a valley or a hip roof, consider a second anchor to minimize the swing fall potential. I have used a secondary short lanyard clipped to a discrete anchor to reposition at a chimney or skylight. Staging and rope management take extra minutes, but they prevent the sudden tug that makes you stumble.
Housekeeping on the roof is safety, not aesthetics
Cleanliness on a roof sounds like something a superintendent nags about. It is, and it is also one of the biggest risk reducers. Tear-off generates a shocking amount of debris. Nails hide under torn shingles, hooks from old flashing sit camouflaged, and felt clings to everything. On a roof shingle replacement, push debris down the slope in a controlled path toward a chute or a designated drop zone. Do not allow loose shingles to stack in random spots where they can slide. Use magnetic sweepers at breaks, not only at the end of the day, because a single loose nail can roll underfoot and fire you toward the eave.
During installation, control the wrapper waste. Shingle bundles come with plastic or paper straps that snag feet and catch the nail gun hose. I pocket the straps as soon as a bundle opens or tuck them into an empty wrapper that I stuff into a five-gallon bucket. Nail coils and stick strips scatter like poker chips. Police them as you go, not later. Housekeeping is also about hose management. Route the air hose upslope and to the side of your body so you never step on it while backing down a course.
Material handling without heroic lifts
A bundle of shingles weighs around 60 to 80 pounds depending on the product. Three-tab bundles are lighter, architectural bundles heavier. Plywood is unwieldy, rolls of underlayment catch the wind, and drip edge behaves like a sword in a crosswind. If you are a DIYer, plan material movement to reduce the number of carries and the distance traveled on the roof. Staging is everything. I prefer to stock bundles just below the ridge, straddling rafters to spread the load, and to stage only the number I expect to use in the next hour or two. Overloading the ridge might not collapse your roof, but it changes how the structure feels underfoot and shifts your center of gravity.
Use a rope and pulley or a Genie lift if you can rent one. If you must carry bundles up a ladder, break them. Many bundles can be separated into half-stacks at the ground. Your back will last longer if you carry half the weight twice. At the edge, lean in with your hips, keep your hands high on the rails, and let the bundle rest on a rung as you reset your grip. On the roof, slide bundles on their wrappers, not bare against the shingles, to keep granules where they belong. Heat makes bundles tacky, so handle them early. The more you move material before the sun climbs, the safer the afternoon will feel.
Working edges, valleys, and penetrations
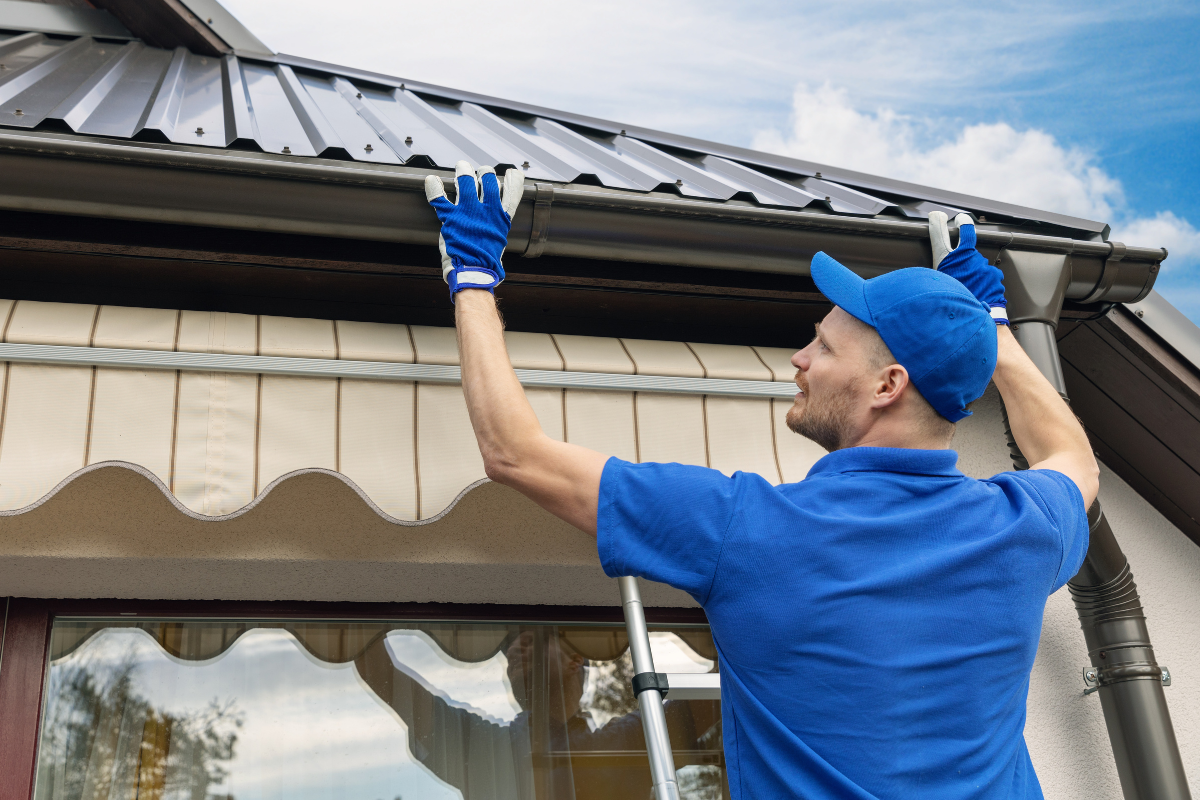
Edges are where gravity wins. Drip edge installation sounds harmless, yet the metal strips act like skis if you step on a long piece. Keep them secured with at least a couple of nails as soon as they are placed. Set up roof jacks and planks below long eaves to give yourself a platform. A 2x10 plank changes an edge from a no-go zone into a stable work area where you can control starter strips and the first course. If you are replacing only a few feet of shingles at the eave, do not be tempted to lean out. Build the support. Ten minutes of setup beats one slip.
Valleys concentrate water and foot traffic. For roof shingle repair in a valley, remove more material than feels necessary so you are not dancing on half-fastened shingles. With open metal valleys, beware of the oil-canning effect. Even a flat valley can rock your foot. Keep a clean strip of metal exposed to see where your next step lands. With woven or closed-cut valleys, watch for nail placement. Nails too close to the centerline become a future leak and a current trip point when the shingle ridges sit proud.
Around chimneys, skylights, and vents, plan your moves before you lift a tool. Flashing pieces are thin and sharp. Old counterflashing may be mortared into brick and break free in shards. Wear gloves, and keep your face away from pry zones. When you lay new flashing, test fit without sealant first so you are not rushing with a tube in one hand and a half-secured piece in the other. Remember that asphalt sealant is not structural. Rely on laps and gravity, then use sealant as a supplement. You reduce callbacks and eliminate the frantic push to smear goop to make a piece stay put.
Nail guns, hand nailing, and fingers
Power tools multiply risk if you treat them like helpers instead of hazards. Coil nailers make fast work of roof shingle installation, yet they kick, they double-fire, and they jam. Keep the nailer set to single-fire if you are not highly practiced. Bump fire looks fast until a double shot plants a second nail a half inch away and your hand is in the path. Keep the safety tip clean. Clots of tar and granules hold the tip open and defeat its design. Check the depth as temperatures change. Soft, hot shingles take nails deeper with the same pressure that barely sets a nail in the morning.
If you hand nail, keep nails in a pouch and your off hand behind the nail head. It sounds obvious until you try to hold a small cut piece at an odd angle near a ridge. Use a magnetic holder or pre-tack a nail so the piece cannot shift. Nails are cheap. Fingers are not. Whether powered or hand-driven, nail placement matters for safety as well as quality. Nails too high leave loose butts that catch your shoes. Nails too low pop through the exposed face and create cuts. Consistent lines are easier to walk on and easier to trust.
Tear-off is demolition, and demolition fights back
On a shingle roof replacement, tear-off is the most dangerous phase, especially for DIYers. Shingles weigh more as a carpet than as bundles, and they slide as a unit. Establish a drop zone, hang tarps, and use a chute if you can. A roofing shovel or tear-off spade is the right tool. Keep your hips and shoulders square to the slope, and pry upward, not sideways. Sideways prying puts your weight off balance and your momentum toward the eave. Work in strips across the roof rather than vertical runs so you do not create a slick lane above a bare deck.
Expect surprises. Rotten decking will not hold your weight. Probe soft spots with the tool handle before stepping. If your foot punches through a punky board, do not yank it out fast. Settle your weight onto your hands and other foot, then back out slowly to keep from twisting a knee. Nails bent by previous work will grab your clothing and gloves. Move as if everything can catch you. Slow is smooth. Smooth is safe.
Heat, hydration, and the pace that gets you home
Roofing punishes your body. Sun reflects off shingles and bakes you from below. The dehydration curve sneaks up, and once you feel dizzy you are already late. Plan water breaks, not just water. I eat small, salty snacks at steady intervals rather than a big lunch that knocks me out for an hour. On hot days, I set a timer for short rests in the shade. Pride in pushing through heat is misplaced. Fatigue correlates with missteps. If you feel your feet scuffing instead of lifting or if you forget where you set the nailer twice in five minutes, call a break.
Pacing includes task selection. Cut and fit pieces in the cooler morning. Do long, repetitive courses when you can let muscle memory carry you. End the day early enough to clean up while your legs are fresh. The last half hour on a roof should never be rushed. That is when people step on hoses, forget about the loose coil near the ridge, or choose to carry a tool down instead of lowering it.
When a shingle roofing contractor is the safer choice
Some jobs are ideal for a handy homeowner. Replacing a few missing shingles after a windstorm, patching a small leak around a vent, or laying a few squares on a low-slope detached garage are realistic. Once the pitch steepens, the roof grows past a simple rectangle, or the repair touches a chimney or a complex valley, the risk climbs fast. That is when a seasoned shingle roofing contractor earns their fee. They bring staging, harness systems, crew coordination, and muscle memory that compresses exposure time. If your roof exceeds two stories, your decking shows widespread rot, or your local code calls for specific underlayments and ice protection you have not used before, the wise safety decision is to hire out. You can still participate by handling scheduling, material selection, and site prep.
A simple pre-climb safety checklist
- Weather within safe range, roof dry, wind under 20 mph, shade plan in place Ladder extends 3 feet past eave, tied off, solid footing, clear landing zone Harness, anchors, rope, and grab inspected, anchors placed into structure Tools staged, hoses routed upslope, waste plan and drop zone set Water, snacks, breaks scheduled, phone charged, first-aid kit accessible
The small habits that keep you upright
Experience turns into small habits that seem trivial until you notice how often they save you. I step onto a roof and immediately clear a two-by-two foot square at the landing so the next person or the later version of me has a safe return spot. I tap my soles together at the ridge to shed granules every time I cross. I put the nailer on its side with the tip pointing downhill so it cannot slide toward the edge. I keep a whisk broom in my pouch to sweep a workspace before laying flashing. When I unbox a vent or a skylight, I count the blades on the flashing and check for burrs with a glove. Every cut edge is a potential slice.
Communication matters even if you are solo. Say out loud what you are about to do when it involves a risk jump, like, I am going to lean to set this starter. It forces a mental check. If you are working with a helper, call moves. Hoses coming up. Bundle sliding. Nail gun hot. You build a pattern that prevents surprises.
Technical safety that improves the finished roof
Good safety practices often lead to better roofs. Proper starter course alignment reduces the need to reach beyond a comfortable stance. Straight, consistent reveals mean fewer shimmy moves to correct gaps. Keeping nails out of the bond line not only prevents leaks, it prevents tiny proud spots that trip your feet. Using more roof jacks than you think you need creates platforms that let you place the next course cleanly and hit the right nail line without contorting. Underlayment kept flat and tight, with cap nails rather than staples near edges, resists wind while you work and after you leave.
Ventilation touches safety as well. Working around ridge vents and soffits, keep openings protected during tear-off so you do not step into voids. When installing ridge vent, keep the cut consistent and cover it immediately. The longer an opening remains open, the higher the chance of a misstep. Likewise, install temporary covers over skylight openings from inside before you remove the unit. A fall through is as dangerous as a fall off.
A word on permits, codes, and neighbors
Safety is bigger than your feet on shingles. Many jurisdictions regulate roof shingle installation and specify underlayments, ice and water shields, and ventilation ratios. Pulling a permit might feel bureaucratic, but the process often includes a pre-work checklist that nudges you toward safer planning. If you are planning a roof shingle replacement, check whether your area requires tear-off down to the deck rather than overlaying. Overlays are not only a quality compromise, they add weight and hide rotten decking, which is a safety trap.
Talk to neighbors. Let them know when you will drop debris and when the driveway must stay clear. A falling shingle from twenty feet can gouge a car hood. Cones and caution tape keep curious kids from strolling into your drop zone looking for treasure. Good fencing of the work area is part courtesy, part risk management.
Emergency readiness you hope not to use
Plan for what you pray will not happen. Keep a charged phone in a pocket, not in a toolbox. Make sure someone on the ground knows you are up there and checks in by text or by sightline. Have a first-aid kit with gauze, tape, antiseptic, and a tourniquet. Most roofing injuries are cuts and punctures. A clean compress and pressure buy you time. Know your address, including cross street, for a 911 call. If you are wearing a harness, understand how to self-rescue or how a helper can assist quickly. Suspension trauma sets in faster than people think. A second rope or a short lanyard that allows you to pull to a standing surface can be the difference between a scary moment and a medical emergency.
Recognizing when to call it for the day
Stubbornness is the unseen hazard on DIY jobs. You plan to finish a side before dinner, then a ridge cap takes longer or a felt roll tears, and you start gambling with daylight. Stop before dusk. Shadows change depth perception. Hoses and bundles blend into the roof color at sunset, and cool air brings dew. If you must weather-in fast, focus on essentials. Get underlayment tacked tight, seal the ridge with a temporary cover, and button up penetrations. Come back sharp. The roof will still be there. The risk curve at the end of the day is not worth the few rows you might squeeze in.
The payoff of a safe, deliberate approach
DIY roofing has a certain satisfaction. You see lines straighten, patterns repeat, and the roof start to gleam. The job goes best when you slow the front end. Walk the roof, plan the anchors, stage material, and set breakpoints. On a small shingle roof repair you can apply the same habits at a smaller scale: dry roof, solid ladder, focused footing, and clean work area. On a larger roof shingle installation, break the job into planes and days, and do not let pride drag you onto slopes you cannot protect.
A final thought from years of shingle roofing: confidence is not bravado. Confidence is a checklist, a harness that you use rather than carry, a ladder that never wobbles, and a habit of brushing your soles before stepping off the ridge. Build those habits, and every sheet of underlayment and every course of shingles will go down straighter, faster, and with less drama. If you decide to call a shingle roofing contractor for the parts that exceed your comfort or your gear, that is not defeat. It https://paxtonmwgk837.lowescouponn.com/signs-of-poor-roof-shingle-installation-and-how-to-fix-them is part of doing the job well. The goal is a dry house and an uninjured crew. Everything else is detail.
Express Roofing Supply
Address: 1790 SW 30th Ave, Hallandale Beach, FL 33009
Phone: (954) 477-7703
Website: https://www.expressroofsupply.com/
FAQ About Roof Repair
How much should it cost to repair a roof? Minor repairs (sealant, a few shingles, small flashing fixes) typically run $150–$600, moderate repairs (leaks, larger flashing/vent issues) are often $400–$1,500, and extensive repairs (structural or widespread damage) can be $1,500–$5,000+; actual pricing varies by material, roof pitch, access, and local labor rates.
How much does it roughly cost to fix a roof? As a rough rule of thumb, plan around $3–$12 per square foot for common repairs, with asphalt generally at the lower end and tile/metal at the higher end; expect trip minimums and emergency fees to increase the total.
What is the most common roof repair? Replacing damaged or missing shingles/tiles and fixing flashing around chimneys, skylights, and vents are the most common repairs, since these areas are frequent sources of leaks.
Can you repair a roof without replacing it? Yes—if the damage is localized and the underlying decking and structure are sound, targeted repairs (patching, flashing replacement, shingle swaps) can restore performance without a full replacement.
Can you repair just a section of a roof? Yes—partial repairs or “sectional” reroofs are common for isolated damage; ensure materials match (age, color, profile) and that transitions are properly flashed to avoid future leaks.
Can a handyman do roof repairs? A handyman can handle small, simple fixes, but for leak diagnosis, flashing work, structural issues, or warranty-covered roofs, it’s safer to hire a licensed roofing contractor for proper materials, safety, and documentation.
Does homeowners insurance cover roof repair? Usually only for sudden, accidental damage (e.g., wind, hail, falling tree limbs) and not for wear-and-tear or neglect; coverage specifics, deductibles, and documentation requirements vary by policy—check your insurer before starting work.
What is the best time of year for roof repair? Dry, mild weather is ideal—often late spring through early fall; in warmer climates, schedule repairs for the dry season and avoid periods with heavy rain, high winds, or freezing temperatures for best adhesion and safety.