Replacing a shingle roof is part construction project, part choreography. There are materials to stage, schedules to align, neighbors to consider, and a whole lot of dust and noise. The better you prepare, the smoother it goes, and the fewer surprises you’ll face once the first bundle of shingles comes off. I’ve managed roof projects for homeowners under tight timelines, through heat waves and early frosts, with pets, pools, skylights, solar panels, and one very protective parrot named Gus. Here’s what I’ve learned to help you get your home ready for shingle roofing work with less stress and better results.
Start with the right scope and timing
Preparation begins weeks before anyone shows up with ladders. A shingle roof replacement sounds straightforward, but scope creep happens fast: rot around a chimney, a vent in the wrong place, or decking that fails a nailing test can add time and cost. Walk the plan with your shingle roofing contractor while the weather is still on your side. Asphalt shingle manufacturers typically recommend installation above roughly 40 to 45°F for proper sealant activation, though cold weather installs are possible with hand-sealing. Heavy rain, dewy mornings, and high winds all slow progress and increase risk. If you have flexibility, choose a window with a 3 to 5 day stable forecast.
Ask your contractor how many squares of roofing they expect to replace, how many crews they’ll send, and whether they plan a full tear-off. A two-layer tear-off moves slower than a single layer, and steep pitches require additional safety rigging, which affects duration. For an average 2,000 square foot single-story home with a simple roofline, a seasoned crew often completes a full roof shingle replacement in 1 to 2 days. Add complexity, and you can double that.
Vet the contractor and the contract
Most of what derails a project is vague agreements. Request a written proposal that lists materials by brand and line, not just generic “architectural shingles.” Confirm the underlayment type (felt versus synthetic), ice and water shield coverage (eaves only or valleys and penetrations too), flashing approach, and ventilation changes. If you’re upgrading from 3-tab to architectural shingles, ask about added weight, nailing patterns, and wind rating. If your attic has moisture stains or a musty smell, budget for ventilation adjustments along the ridge or soffits.
Insurance and licensing matter. Ask for certificates directly from the insurer, not just a PDF. Worker’s comp and liability coverage protect you if something goes wrong. Clarify who pulls permits and schedules inspections. In most areas, a roof shingle installation permit is required for full replacement. If your home is in an HOA, submit the shingle color, style, and ridge cap details for approval early, or you may face a stop-work order once the dumpster arrives.
Communicate with neighbors and plan for noise
Roofing noise is not subtle. Nail guns, tear-off shovels, compressors, and footsteps across decking will carry. If your neighbors have infants, night-shift workers, or anxious pets, a heads-up goes a long way. I’ve seen disputes over noise evaporate when homeowners shared the project dates and offered neighbors a cellphone number for quick coordination about parking and access. Set expectations for work hours. Many municipalities restrict roofing activity to business hours on weekdays, with limited allowances on Saturdays.
Protect the house from the outside in
The day before a tear-off, I like to do a perimeter walk, starting at the eaves and working outward. Anything delicate near the drip line is at risk. Tear-off tools can send small pieces of asphalt and nails flying. Wind will carry dust. Gutters fill with granules. You want to think like gravity and plan accordingly.
Move patio furniture, grills, and potted plants away from the house. If something is immovable, like a built-in grill or stone urn, wrap it in thick moving blankets and plastic. Fish ponds and pools benefit from covers that are tight and secured around the edges. If you have deck boards with visible gaps, lay down inexpensive plywood sheets or heavy tarps to catch nails and prevent stains. Downspouts scratch easily when ladders slide, so ask the crew to use standoffs or pads where they lean equipment.
Landscape protection often separates pros from pretenders. Good crews hang nets or use plywood lean-tos to direct debris into the dumpster. If you have shrubs or delicate perennials under the eaves, set up lightweight plywood tents the morning of the job. They shield leaves without crushing stems. A little prep saves a season of regrowth.
Make room for materials, trucks, and the dumpster
Roofing projects sprawl. Shingle bundles, underlayment rolls, ridge vents, drip edge, nails, and flashings arrive on pallets. Then comes the dumpster. If your driveway has a sharp turn or pavers that could crack, talk through placement with your shingle roofing contractor. A sheet of 4-by-8 plywood under the dumpster wheels helps distribute weight. If access is tight, mark the best approach with cones the night before so the driver can swing in without chewing up lawn edges.
Garage access changes once materials arrive. If you’ll need a car during the project, park on the street the night before. Garages often become noisy during the day because roofers walk above. Doors can’t always be opened safely when tear-off is happening overhead. A preplanned parking spot reduces last-minute frustration.
Clear the attic and protect what you can’t move
Shingle roof replacement rattles the whole structure. Old fasteners pop, decking flexes, and dust sifts through gaps. If your attic holds holiday decorations, luggage, or clothing, cover everything with plastic sheeting and seal the edges with painter’s tape. If you can, move valuables to a lower floor for a couple of days. In older homes with tongue-and-groove decking, debris sifts more freely than with modern OSB or plywood. I’ve pulled handfuls of grit out of vintage attics after a tear-off. Expect dust. Plan for it.
If you have blown-in insulation close to the soffits, discuss baffles with your contractor. New soffit ventilation only works if insulation is held back to allow airflow into the attic. It’s easier to install baffles when the roof is open than later from inside.
Brace for interior vibration and dust
Pictures, mirrors, and decor hung on nails near ceiling lines can rattle off. I’ve watched a leaning gallery wall migrate an inch by the end of the day. Take down what you love. Cover beds and electronics with sheets, especially in rooms below steep sections of roof where foot traffic concentrates. Ceiling fixtures rarely fall, but glass shades can loosen, and recessed lights may flicker briefly as joists flex. Nothing to panic over, but worth a quick hand-tighten before work starts.
If you have skylights, expect the rooms beneath them to be especially dusty. Good crews mask skylight wells during tear-off and install, then peel it away once the new flashing and shingles are sealed. If you work from home, choose a space far from the roofline. Nail guns punctuate the day in quick bursts that make phone calls difficult.
Power, outlets, and safety zones
Roofers run compressors and saws. They’ll need a GFCI-protected outlet outdoors. If none is available, ask the crew to use a dedicated circuit via a heavy-duty cord through a window. Tape the cord at the threshold to prevent trips. Keep kids and pets away from the perimeter while ladders are set and moved. I like to establish a no-go zone around the drop line under the roof edge. Even careful tear-off sends an occasional nail zinging into the grass.
If you have an electric vehicle, move the charger cable out of traffic lanes. For generators or sensitive electronics, consider a simple surge protector. Power tools cycling throughout the day can cause small voltage fluctuations.
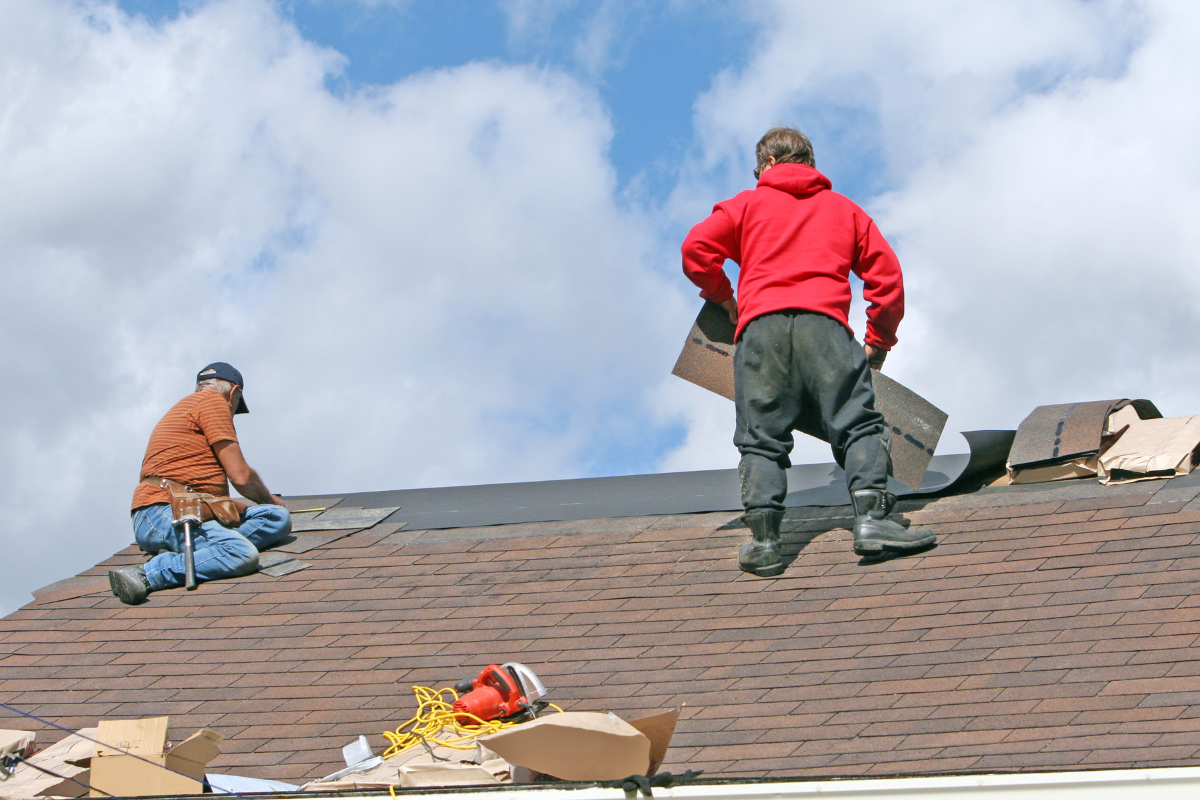
Understand tear-off day and how to help it go smoothly
The first hour sets the tempo. Crews usually start by protecting landscaping and laying down tarps. Then ladders go up, and drip edges come off as old shingles are cut and scraped. Expect a fast rain of debris at the start. If an item is still near the house at 8 a.m., it’s in the hazard zone.
You can help by making the site navigable. Unlock side gates. Point out sprinkler heads near the driveway and shallow utilities if any are known. Mark a safe hose bib for the crew to fill water bottles on hot days, and you’ll have a grateful team. A small cooler with bottled water on the side of the house cuts down on foot traffic through your yard and speeds the day along.
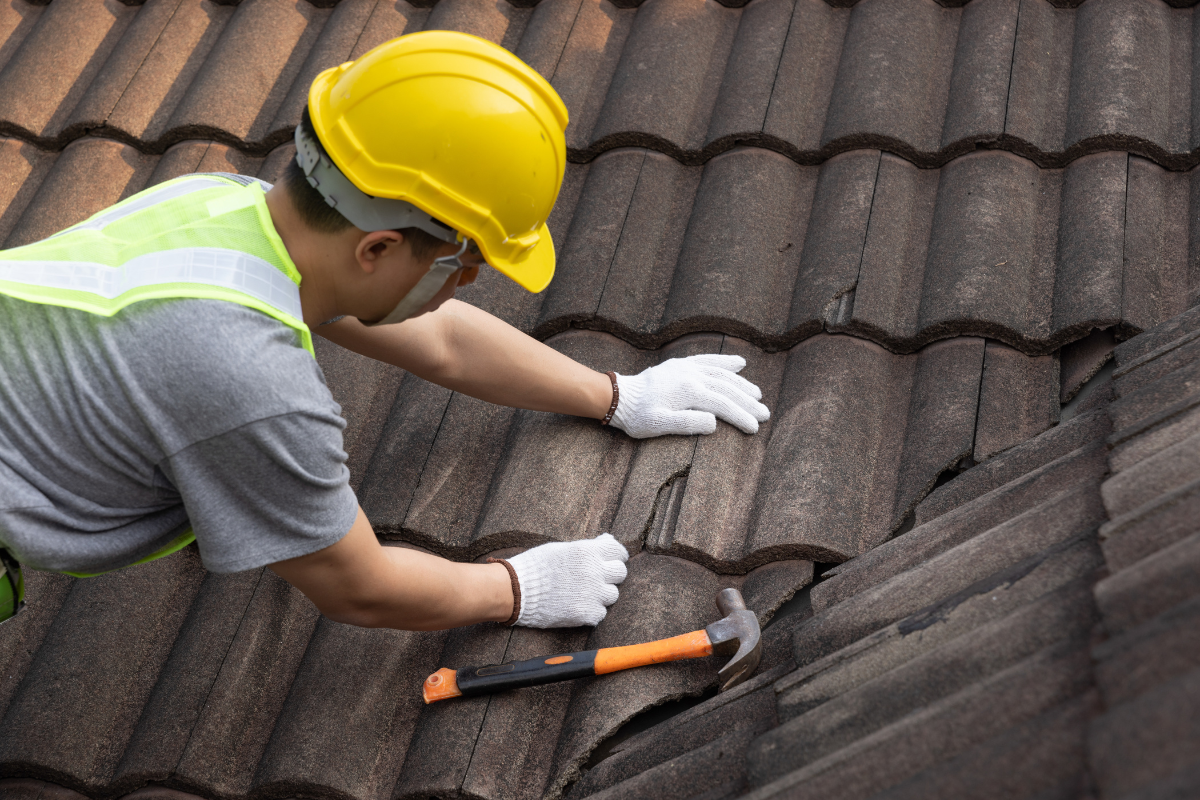
Flashing, valleys, and the places where roofs fail
New shingles cover a multitude of sins, but the roof’s long-term performance rests on details at penetrations and transitions. I always focus inspection energy on valleys, chimneys, skylights, and wall intersections.
- If your last roof leaked at a chimney, insist on new step flashing and counterflashing set into a reglet cut rather than surface caulk. Mortar joints move, and caulk is a short-term patch. A proper metal counterflashing, let in and sealed, lasts. For valleys, ask whether the crew uses a woven shingle valley, a closed-cut method, or an exposed metal valley. In snowy climates, I prefer an ice and water membrane under a closed-cut valley. Woven valleys can trap debris and age unevenly. Plumbing vents should get new neoprene boots or lead covers. Reusing old boots to save a few dollars often results in early failures. Satellite dishes and solar attachments require coordination. Dishes can be remounted to fascia or a post to avoid new penetrations. Solar arrays need de-energizing and removal by a qualified installer before tear-off, then a return visit after shingles are on. Budget the extra time.
Those details are where roof shingle repair often begins a few years after a replacement if they are not done right the first time. There is no shame in hovering politely during these steps. A reputable shingle roofing contractor will explain their approach without defensiveness.
Ventilation and insulation are part of the roof system
Ice dams, attic condensation, and overheated shingles often trace back to poor airflow. When replacing shingles, you have an ideal moment to correct this. Balanced ventilation is the goal: intake at the soffits and exhaust at the ridge, powered by convection, not by fans fighting each other. If you add a continuous ridge vent but your soffit vents are clogged or undersized, you’ve only done half the job.
Count existing soffit vents and check for baffles to maintain clear air paths above insulation. If your home relies on gable vents, discuss whether to keep them or convert the attic to a ridge-and-soffit system. Mixed systems can short-circuit airflow, drawing from the nearest opening rather than across the roof deck. A contractor with a thermal camera can show hotspots and moisture patterns during a quick attic check. Those 15 minutes can add years to the life of your new shingles.
Code requirements and ice protection
Local codes evolve. Many jurisdictions now require ice and water shield at least two feet inside the warm wall from the eaves, which can mean two or three courses depending on pitch and overhang. In colder regions, codes may require the membrane in valleys and around penetrations as well. Ask how far the shield will run up the eaves and whether it will wrap onto the fascia to help with ice dam resistance.
Drip edge is another code item often overlooked. Modern codes require drip edge at eaves and rakes with proper overlap. It’s a small cost with a big payoff in protecting fascia and directing water into the gutters.
Choose shingles for performance, not just color
A roof reads as a solid color from the curb, but architectural shingles vary dramatically in weight, wind warranty, granule quality, and algae resistance. If your area sees high summer sun, look for “cool roof” rated colors that reflect more infrared light. The difference in attic temperature can be 10 to 20°F, which saves on cooling. In humid regions where streaking is common, shingles with copper-infused granules resist algae growth. Ask your contractor to bring a few sample boards so you can view them in morning and afternoon light.
Longevity claims deserve context. A shingle labeled 30-year may perform for 20 to 25 years in harsh sun and wind. Manufacturer warranties often pro-rate after a decade. What matters more is correct nailing, flat decking, and adequate ventilation. When I inspect failed shingles, I usually find high nails or nails driven at an angle in the common bond area. You can’t see these once installed, so hiring a crew with a steady hand is half the battle.
Plan for weather interruptions and overnight protection
Even with careful planning, weather turns. A good crew stages the roof in sections, tearing off only what they can dry-in that day with underlayment and ice shield. If rain threatens, they should have tarps ready and a plan to secure them without driving fasteners through new membrane. Ask how they handle sudden storms. I like to see capped nails or plastic cap staples used on underlayment for better hold in wind.
If the project runs overnight mid-job, expect the roof to be fully dried-in and perimeter secured. Walk the interior in the evening with a flashlight. Check attic spots under valleys and around chimneys after any shower. Catching a drip early avoids a stain on drywall. Keep your contractor’s after-hours number handy.
Nails, magnets, and protecting tires and paws
The least glamorous part of roof replacement is the cleanup, and it matters. Roofing nails bounce. They hide in grass and flower beds. A thorough crew drags magnetic sweepers across the property more than once, including the neighbor’s side if debris drifted. If you have artificial turf or pea gravel, ask them to use a handheld magnet and work slowly. I’ve picked nails out of tire treads weeks after a job because the final sweep was rushed. Take five minutes with the magnet yourself once https://claytonjcrs284.fotosdefrases.com/replacing-roof-valleys-shingle-installation-techniques the crew leaves, especially around drive entries and walkways.
Gutters deserve a flush. Tear-off loads them with granules and shingle crumbs. Ask the crew to run water through and check downspout flow. Granules will wash out over the first few rains, so a second light clean a week later is smart if trees feed debris into your system.
Insurance, documentation, and warranties
If an insurance claim helped fund the roof shingle replacement, keep your adjuster in the loop. Before-and-after photos, receipts for permits, and materials delivery slips help close the file. Contractors often take dozens of progress photos for manufacturer warranty registration. Request copies. They’re useful if you sell the home or need roof shingle repair under warranty later.
Understand the two layers of protection you get: the manufacturer’s warranty on materials and the contractor’s workmanship warranty. The first covers defects in shingles and components, usually prorated after the initial period. The second covers installation errors for a set number of years, often 5 to 10. If your shingle roofing contractor participates in a manufacturer’s certified program, you may qualify for extended system warranties, but those require specific components, such as matching underlayment, starter, and ridge cap.
Budget for surprises and smart add-ons
Even with careful inspection, hidden issues surface. Budget a contingency of 10 to 15 percent for damaged decking or unexpected flashing work. Plank decking older than 1960 can have gaps that fail modern nailing standards. If more than a few boards are soft, replacing whole sections with plywood gives a better base for shingles and a cleaner nail pattern.
Some upgrades are worth the modest cost during a replacement:
- Replace tired bath fan vents with insulated ducts and proper roof caps to reduce condensation. Add snow guards above entry doors in snowy climates if your roof is metal over a porch. Upgrade attic access weatherstripping to minimize heat loss once ventilation is tuned. Install a cricket behind wide chimneys to divert water smoothly. Add gutter guards suited to your tree species after the roof is complete, not before.
Each of these items prevents a small nuisance from becoming a recurring problem.
Special considerations for pets, kids, and daily life
Dogs hear roof work like thunder. Cats find the quietest closet and stay there. If you have anxious pets, consider daycare for the main tear-off day. It lowers stress and reduces the risk of a door being left ajar while crews move tools. For toddlers, roofing day is a spectacle, but it’s also a safety challenge. Set clear indoor play zones. Nails and tarps are tempting obstacles for little explorers.
If you work from home, noise-canceling headphones help, but be realistic. Schedule video calls in early morning or late afternoon, when crews are setting up or winding down. If your bedroom sits under the steepest pitch, plan a guest room or sofa for a midday nap if needed. The project is short, but intense.
What to do after the last nail is set
A good handoff feels like finishing a marathon with energy left. Walk the roof perimeter with your contractor. Look at ridge lines for straightness and consistent ridge cap overlap. Check that vents are plumb, pipe boots fully seated, and flashing sealed neatly without globs of mastic. Confirm the color match on replacement vents and accessories. If you have skylights, inspect the interior wells for smudges or torn drywall paper.
Inside, take one more pass through attic spaces with a flashlight, especially after the first rain. A drip now is easier to fix than a ceiling repair later. Keep a small jar to collect stray nails you find over the next week. It’s normal to spot a few. If you find more than a dozen, ask for another magnetic sweep.
File your warranty documents. Most manufacturers require online registration within 30 to 60 days, including the install date and shingle lot numbers. If your contractor handles registration, ask for confirmation. Note the workmanship warranty period on your calendar with a reminder six months before it expires so you can schedule a courtesy inspection.
When repair beats replacement, and how to tell the difference
Not every roofing issue demands a full tear-off. If your shingles are less than halfway through their expected life and you see a localized leak at a vent or valley, roof shingle repair by a skilled technician can solve the problem without touching the rest of the roof. Look for cracked boots, lifted flashing, or missing fasteners on ridge vents. However, if you have widespread granule loss, curled tabs across sunlit slopes, or random leaks in different areas after wind storms, you’re money ahead to invest in a complete roof shingle installation. Patching tired shingles is like gluing an old tire; you might fix the puncture, but the tread is past its limit.
A responsible shingle roofing contractor will tell you when repair suffices and when the deck or underlayment integrity is suspect. Ask for photos and explanations. Good pros love to teach. Their transparency is often the best indicator you’ve hired the right team.
Regional nuances that change the prep
Climate, building stock, and local trades shape the process. In Florida and the Gulf Coast, uplift resistance and secondary water barriers dominate the conversation. Expect more fasteners per shingle and peel-and-stick membranes across the field in some cases. In the Upper Midwest and Northeast, ice dam protection pushes ice shield farther up the eaves and around dormers. High-altitude sun in the West accelerates shingle aging, making ventilation and UV-resistant granules more critical.
Historic districts may impose specific shingle profiles or colors. If your home is in a designated area, pull design guidelines early. Approval meetings can add weeks. If you have a log or timber frame, be ready for the contractor to stage extra deck protection to limit vibration near exposed beams and tongue-and-groove ceilings.
A realistic timeline from first call to final sweep
Homeowners often ask how long the whole process takes, not just the physical installation. A typical cadence goes like this: two to three days to receive and compare bids, one week to finalize materials and colors, another week for permits and HOA approvals if needed, then scheduling once materials are available. During busy seasons, lead times stretch. Expect a 2 to 4 week window from signed contract to install in spring and fall, shorter in mid-winter or high summer in some markets.
Once work starts, a straightforward shingle roof replacement wraps in 1 to 3 days. Add a day for plywood replacement if extensive, or for complex flashing around stone chimneys and multiple skylights. Clean-up and gutter flushing happen the final afternoon. If weather pauses the job, the crew should leave the roof sealed. Ask for a quick message that evening confirming status.
Your short checklist for the night before
Use this only as a memory jog to complement the planning above.
- Move vehicles to the street and clear the driveway for the dumpster and deliveries. Cover attic items with plastic and remove wall decor prone to rattling. Pull furniture, grills, and planters away from the house; tarp decks and protect landscaping. Arrange pet care and set interior no-go zones for kids. Confirm start time, access points, power outlet location, and who has permits.
The payoff for careful preparation
A roof is quiet when it does its job. No one stands in the yard to admire flashing details at a vent stack on a rainy night, but that is what lets you sleep. Preparation makes those hidden parts perform. It lowers stress during the loudest hours, trims the risk of damage to your home and yard, and gives your contractor the conditions to work efficiently and precisely. Whether you’re planning a roof shingle repair in a hard-to-reach valley or a full roof shingle replacement across a complex hip and ridge, the groundwork you lay beforehand sets the tone.
Invest a few evenings to plan the scope, tune the schedule to the weather, and ready your property. Choose a shingle roofing contractor who talks more about underlayments and ventilation than just color swatches. When the last bundle is gone and the magnets have made their rounds, you’ll have more than a new shingle roof. You’ll have fewer future surprises, quieter storms, and the satisfaction of a project handled like a pro.
Express Roofing Supply
Address: 1790 SW 30th Ave, Hallandale Beach, FL 33009
Phone: (954) 477-7703
Website: https://www.expressroofsupply.com/
FAQ About Roof Repair
How much should it cost to repair a roof? Minor repairs (sealant, a few shingles, small flashing fixes) typically run $150–$600, moderate repairs (leaks, larger flashing/vent issues) are often $400–$1,500, and extensive repairs (structural or widespread damage) can be $1,500–$5,000+; actual pricing varies by material, roof pitch, access, and local labor rates.
How much does it roughly cost to fix a roof? As a rough rule of thumb, plan around $3–$12 per square foot for common repairs, with asphalt generally at the lower end and tile/metal at the higher end; expect trip minimums and emergency fees to increase the total.
What is the most common roof repair? Replacing damaged or missing shingles/tiles and fixing flashing around chimneys, skylights, and vents are the most common repairs, since these areas are frequent sources of leaks.
Can you repair a roof without replacing it? Yes—if the damage is localized and the underlying decking and structure are sound, targeted repairs (patching, flashing replacement, shingle swaps) can restore performance without a full replacement.
Can you repair just a section of a roof? Yes—partial repairs or “sectional” reroofs are common for isolated damage; ensure materials match (age, color, profile) and that transitions are properly flashed to avoid future leaks.
Can a handyman do roof repairs? A handyman can handle small, simple fixes, but for leak diagnosis, flashing work, structural issues, or warranty-covered roofs, it’s safer to hire a licensed roofing contractor for proper materials, safety, and documentation.
Does homeowners insurance cover roof repair? Usually only for sudden, accidental damage (e.g., wind, hail, falling tree limbs) and not for wear-and-tear or neglect; coverage specifics, deductibles, and documentation requirements vary by policy—check your insurer before starting work.
What is the best time of year for roof repair? Dry, mild weather is ideal—often late spring through early fall; in warmer climates, schedule repairs for the dry season and avoid periods with heavy rain, high winds, or freezing temperatures for best adhesion and safety.